
How to Choose the Right Print Size for Wall Displays in Your Home
A practical guide to sizing a fine art landscape print for your wall, covering furniture proportions, viewing distance, framing allowances and hanging height.
The Collector’s Guide
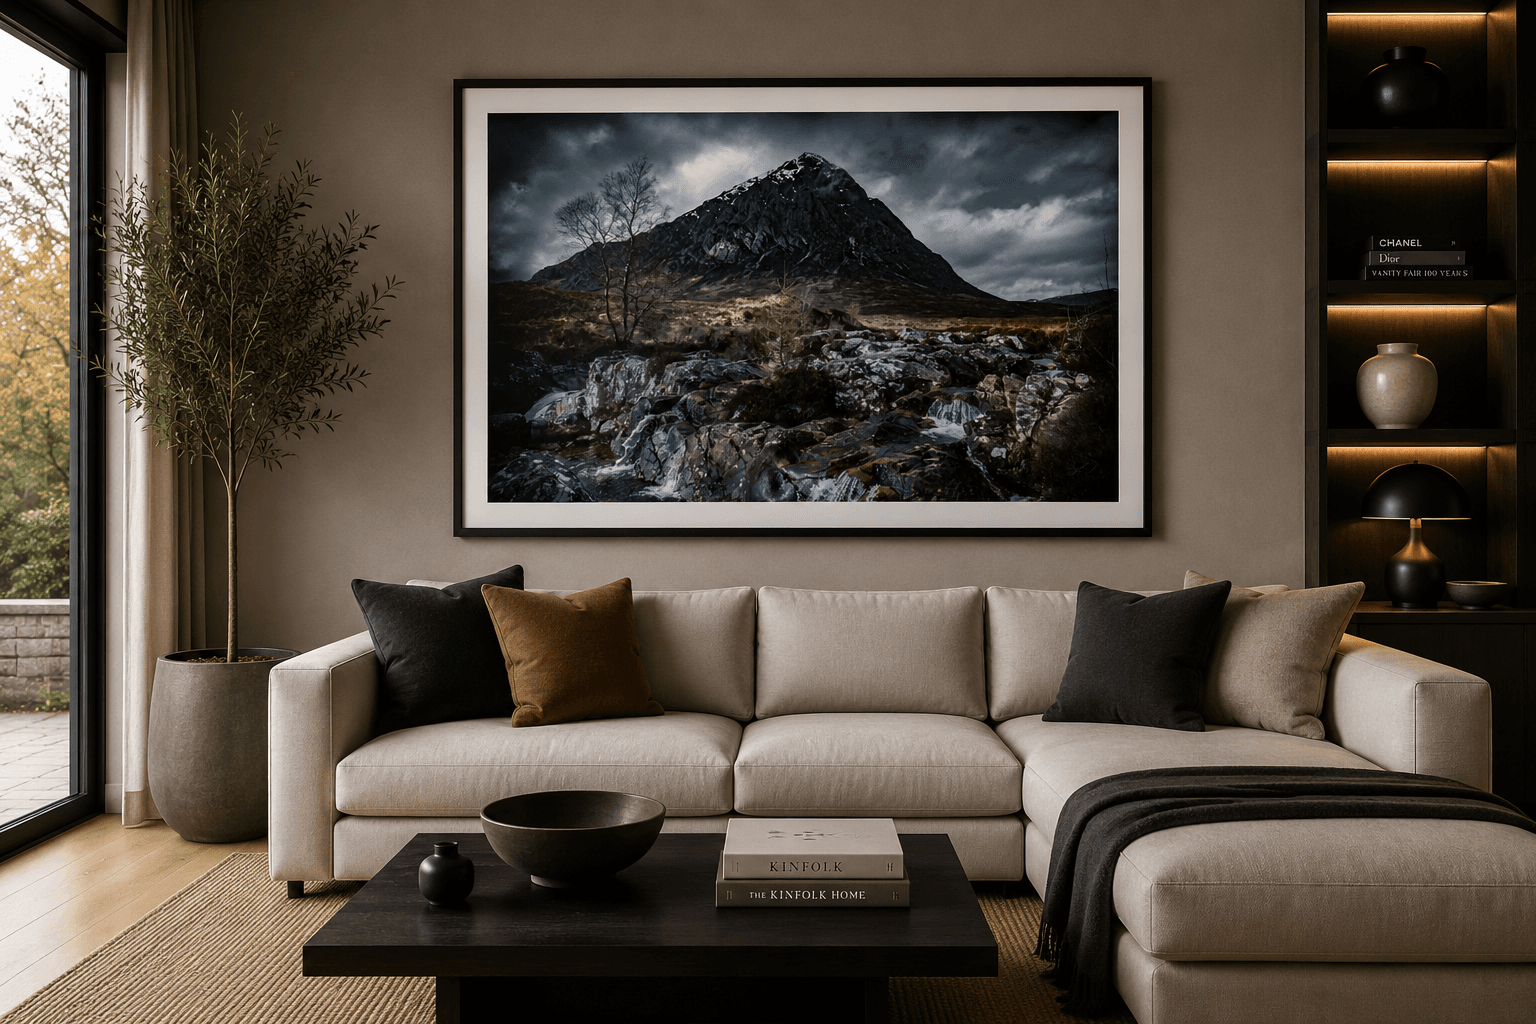
To choose the ideal print size for a wall, select a piece that spans between two thirds and three quarters of the width of the furniture beneath it, or one proportioned generously across an open, unoccupied surface. Choosing a photograph is an emotional decision, yet its physical presence in a room depends entirely on balance, spatial geometry and proper framing.
The aim is not simply to fill a wall. A landscape photograph should anchor a room, inviting your gaze into the misty quiet of a Scottish loch, the weathered tiles of Porto, or the golden morning light touching stone in Paris or Prague. When a print is too small it looks lost and untethered. When it is too large it crowds the room, suffocating the visual breathing space an interior needs.
Finding the proper balance means assessing room architecture, furniture placement, viewing distances and the additional width added by a mount or frame. A few practical measurements and a roll of low-tack painter’s tape will reveal the exact dimensions that honour both the image and your home.
What print sizes actually mean
Print dimensions describe the paper, not the picture. A photograph ordered at 40 by 50 centimetres refers to the unrolled sheet. If the image carries a white border around the composition, the visible picture is smaller than the sheet, creating a little visual relief before framing even begins.
The medium changes what those dimensions mean on your wall. A canvas wraps printed fabric around wooden stretcher bars, giving the work depth that projects outwards into the room without glass. A paper print sits flat, gaining its depth and boundary from the layering of a mat and a glazed frame.
Across Britain and Europe the ISO 216 paper standard governs everyday framing, scaling from A0 down to A4 while holding a constant proportion of roughly 1 to 1.414. Because full-frame photography produces a 3:2 ratio, mounting a native photograph in an off-the-shelf A-series frame calls for either a bespoke window mat or a small amount of cropping. Metric sizes outside the A-series, such as 40 by 50 or 50 by 70 centimetres, bridge that gap and are widely supported by European framers.
Sizing a print above a sofa or a bed
The best size above a sofa is one measuring between two thirds and three quarters of the sofa’s total width. For a three-seater of around 210 centimetres, a single framed landscape or a balanced set should span roughly 140 to 160 centimetres, hung 15 to 25 centimetres above the sofa back.
A print matching the full width of your seating feels top heavy. An isolated small print above a wide couch creates the opposite problem, drawing attention to empty plaster rather than to the photograph. If you prefer a single frame, a wide panoramic composition gives the room a grounding focal point. If you prefer several, a pair or a triptych hung with uniform gaps of five to eight centimetres achieves the same footprint while letting different views of one journey speak to each other.
In a bedroom the work should invite rest. A wide horizon, or the soft evening light falling down a cobbled street in Porto, settles the space when sized generously over a headboard. Keep the base of the frame about 20 centimetres above the mattress or headboard edge so the piece feels connected to the bed without becoming a hazard.
Open walls, hallways and stairwells
Empty walls behave differently from walls grounded by furniture. Without a table, chest or sofa to set the baseline, the boundary of the wall itself establishes the scale. In an expansive hallway, a staircase landing or a dining room with an uninterrupted surface, an undersized print looks unanchored, like a postage stamp on a billboard.
Stairwells deserve particular care, because the floor rises steeply beneath the work and your eye line changes with every step. Rather than one large horizontal print colliding with the angle of the stairs, consider a staggered set of vertical pieces, or reserve the main landing wall for a single commanding photograph.
Wherever you hang on an open wall, keep the centre of the image at eye level, which gallery practice places around 145 to 150 centimetres from the floor. That measurement applies to the visual centre of the photograph, not the top or bottom of the frame. Aligning several works of different sizes along a shared centre line keeps a room orderly even when the frames vary.
Viewing distance and scale
Scale is not only decoration; it shapes how you meet a photograph. Standing close to a print made on museum-grade rag paper with pigment inks, you see the tactile surface of stone, mist above water, subtle shifts in tonal shadow. Step back and those details resolve into structure and mood.
As a working rule, a photograph reveals itself best from a distance of about 1.5 to 2 times its diagonal measurement. A print with a one-metre diagonal wants a viewing distance of roughly 1.5 to 2 metres. Place a small print across a four-metre living room and the fine detail vanishes into an indistinct patch of colour. Hang something enormous in a narrow vestibule and the viewer inspects square inches without ever absorbing the whole.
I think often of an afternoon on the quays in Paris, waiting for rain to pass so the reflections on the asphalt would catch the street lamps. A scene like that carries intricate lines, wet reflections and delicate gradients of sky. Printed small, those textures blur together. Sized properly for the viewing distance of the room, the photograph keeps the exact atmosphere of that damp evening.
How mats and frames change the final dimension
The paper size is only part of the equation. A window mat, the frame moulding and any unprinted border all add to the final footprint, and it is the footprint that has to fit your wall.
A mat separates the photograph from the glazing, protecting the pigment inks from condensation while providing a quiet transition between image and frame. A generous mat also isolates the picture from a strong wall colour. Traditional framing often balances these proportions mathematically, and a print of 40 by 60 centimetres matted that way typically gains another 12 to 15 centimetres on each side.
As a rough guide: a bare print in a narrow frame adds two to four centimetres overall; a print with a five-centimetre mat and a medium frame adds around 14 to 18 centimetres; a generous eight-centimetre mat with a substantial timber moulding adds 20 to 26 centimetres. A stretched canvas adds nothing, unless you choose a floating frame, which adds about two centimetres around the perimeter. Subtract the finished frame width from your wall measurements before you order.
Aspect ratio and the integrity of the composition
Photographs are bound by the geometry of the sensor that captured them. Full-frame 35mm photography produces a 3:2 ratio: three units of width for every two of height. Frame suppliers, meanwhile, build around paper formats and poster conventions, so forcing a 3:2 landscape into an 8 by 10 inch frame shears visual narrative off the edges.
The integrity of the original image comes first. When I frame a scene in the dramatic light of Prague or among the ancient stones of Scotland, the balance across the edges is deliberate, and the picture is never stretched into an artificial shape. When you order prints, check whether the sizing follows photographic proportions or paper standards. A custom-cut mat lets the full, uncropped composition sit inside a standard frame.
One statement piece, or a group?
A single large photograph creates a quiet, contemplative atmosphere. In a spare, contemporary interior, a wide view of a desolate Scottish glen or the sweeping curve of the Douro simplifies the room and gives the eye one place to rest.
A group introduces rhythm instead. Three, four or six smaller framed prints suit spaces where people linger or move slowly: dining areas, wide hallways, staircases. A collection lets you set the intricate architecture of a European archway beside a wider environmental view.
If you choose a group, keep the gaps tight and consistent, usually four to eight centimetres, and treat the whole cluster as one composite block. Measure the total outer dimension of the arrangement, frames and gaps included, against the furniture below. If the cluster spans around 65 percent of the sofa width, it will read as unified rather than scattered.
Test it with tape before you commit
Digital mockups help, but nothing matches testing dimensions against your own plaster. Shadows, ceiling height, door mouldings and nearby furniture alter your sense of scale in ways a screen cannot reproduce.
Use low-tack painter’s tape to map the outer dimensions of the finished frame directly on the wall. Find the visual centre first: measure 145 centimetres up from the floor for an open wall, or 20 centimetres above the furniture back. Then build a complete rectangle representing the outer edge of the frame.
Leave the outline up for a full day. Walk past it in the morning light. Sit opposite it in the evening with the lamps on. Does the footprint make the room feel cramped or open? Can you read its boundaries from your favourite chair? Does it leave clearance beneath the light fittings? If the outline feels insubstantial, widen it by 15 or 20 centimetres and look again. Seeing the perimeter marked out is what gives you the confidence to commit.
Common questions
What is the difference between A4 and 8 by 10 inches? An A4 print measures 210 by 297 millimetres with a ratio of 1 to 1.414, while an 8 by 10 inch print measures 203 by 254 millimetres at 4:5. A4 is longer and narrower; 8 by 10 is squarer. They need different frames and mats.
What are the most common sizes in a home? Small accents at A4 or 8 by 10 inches, mid-sized pieces at 30 by 40 and 40 by 50 centimetres, and statement formats at 50 by 70 centimetres or 61 by 91 centimetres. These match off-the-shelf frames and standard stretcher bars.
Which size suits most rooms? Forty by fifty and 50 by 70 centimetres sit comfortably above desks, dressers and hallway consoles, and ready-made frames for them are easy to find, which is why they are the sizes most people settle on.
What to do next
Getting the size right is the difference between a lasting window onto another place and an awkward piece of decoration. Take a tape measure to the space, map your target dimensions with low-tack tape, and check your viewing lines from across the room.
If you would like help choosing the right photograph for a particular wall, write to me and tell me about the space.